Wednesday 8 November 2017

Bouncy Bands for the Classroom

Do you do any sort of flexible seating in your classroom? Are you interested in adding some flexible seating options without changing your classroom too much? I am lucky to have a bunch of different flexible seating options, but one of the most popular options is the regular desk chairs with the Bouncy Bands attached to them. I've compiled a top ten list of awesome things about Bouncy Bands to share with you here.


Top Ten Benefits of Bouncy Bands:

1. They offer students a chance to get their wiggles out without them having to get out of their seats.

2. They are strong and durable. They are well made to last you a long time with frequent classroom use.

3. They are easy to use and install--they just slip onto the legs of a desk or chair. They stay in place well too. They never fall off. I stack my chairs at the end of the day too and they just slide up the legs quickly to stack them easily.


4. They aren't costly like other flexible seating options. They start at $13.95 each for elementary school chairs. You can get options for desk legs instead and they also make specialty ones for chairs that don't have. If you don't have much of a classroom budget, here are some tips on getting your Bouncy Bands funded through Donor's Choice.

5. They are quiet! I don't even hear them in my classroom when my students are bouncing their feet on them throughout the day.

6. They help students focus in class. Here's a small survey done at at Gravette Upper Elementary. There is also more research done about the benefits of Bouncy Bands here.

7. You can say no to fidget spinners by offering them a Bouncy Band instead! ;)


8. The CEO and founder of Bouncy Bands is a school counsellor--someone who actually works with students and understands what would help students learn and focus best!

9. Bouncy Bands are great for all learners, but especially students that may have ADHD, autism spectrum disorder, anxiety, or active students.

10. They work for any age level. They come in different sizes for different chairs/desks. The benefits are the same for all ages--it helps them focus and pay attention!


Go check out bouncybands.com to learn more about them or make your purchase! :)

Disclosure: This post was sponsored by Bouncy Bands but all thoughts and opinions are my own.

Monday 10 July 2017

Monday Motivation: Daily Schedule

Hey friends, I'm back again to link up with Teacher by the Beach's Monday Motivation link up. I missed last weeks about word walls, but I'm back today to talk about daily schedule.


Here's a look at my timetable for next year. We run on a 6-day cycle instead of a day of the week cycle (so we don't miss specials due to Mondays or Fridays off). So the first day of school is Day 1, the next days is Day 2, etc.


I like to always have a visual display of or schedule on the whiteboard. I have magnets on the back of the cards so I can just switch them out daily. Students check this to see what we have going on for the day! You can find my Chalkboard & Brights Editable Schedule Cards {here} or the less ink version {here}.


No matter the day of the cycle, our morning routine remains the same. The bell rings at 8:45am for students to enter. They hang up their jackets and backpacks (last year I had hooks in the hallway; this year I have cubbies in my new room), change into their indoor shoes, some students go to morning reading (students who need extra practice read with an EA), they hand in their agendas, they change their home reading book, they answer the question of the day, and then they choose a STEAM bin and a place to work (last year I had them silent read; next year I am trying out STEAM bins!). You can read more about last year's morning routine {here}.


Here's a look at my odd day schedule:


My students have music class right after O'Canada, so I have a prep first thing. I'm sure this will have it's benefits and drawbacks.

I am currently reading The Morning Meeting Book right now, so I think I will begin my day with morning meeting. On odd days, morning meeting will be right after music class. We will do a greeting, sharing/news, a quick version of calendar, and then an activity (which will focus on character education, health topics, or STEAM activities). I don't plan to do morning message, because I will do some interactive writing later on. 

I'm planning on changing up how I do my ELA block. I'm going to break up my guided reading rounds with mini lessons in between, more like Daily 5 style. Each mini lesson will be about 10-15 minutes and the guided reading round will be about 15-20 minutes long. I will do a reading/author study mini lesson and our first guided reading round. Then I will do a phonics/sight words mini lesson and our second round. Last I will do a writing mini lesson and our third round. I haven't decided if my third round will be a regular round or if it will be a writer's workshop type round. I'm still debating this. 

Guided math will take a similar format. I will start off with a mini lesson. I talked about math stretches before {here} and will use some of the same activities next year. I will use math picture books, patterning activities, graphing activities, Number of the Day, but also want to add in some Number Talks. I bought this awesome pack Talking Numbers from The Brown Bag Teacher that I want to incorporate. After the first mini lesson/activity, we will do a round of guided math. Then we'll clean up and meet together for a problem solving mini lesson. Then go to our second round of guided math. 

For theme next year I am planning on doing a more inquiry-based type of learning. We are going to start the year with a more teacher-led inquiry based on our science unit of "The Characteristics of Objects and Materials" and talk about how things are made and do some making ourselves in our new classroom MakerSpace! We will be doing a lot of exploring, creating, and . My inquiry units will take the shape of Provoke, Explore, Reflect. I created a unit plan for my last Post Bacc course to organize some of my ideas for this inquiry unit. You can read more about it {here} if you wish. 

Some days we might have library or computer class during our theme time. I will try and use them to connect to our inquiry studies as well. 

Then end of the day, we will write in our agenda books any notes or something we did that day. Then we will do classroom clean up. I want my students to feel ownership and responsibility for our classroom, so I want them to help with stacking the chairs, wiping tables, sweeping the floors, etc. Then it's home time! :)


The only difference between odd and even days is that instead of music first thing, we begin our day in the classroom with morning meeting and two rounds of guided reading. After recess, they have gym (and I have a prep) and then we end the morning with a third round of guided reading. The afternoon is exactly the same as even days. Usually on Fridays we will have buddy reading right after lunch instead of our first round of guided math.

That's my schedule in a nutshell! We'll see how it goes next year! ;) Let me know if you have any questions!

Tuesday 27 June 2017

Monday Motivation - Managing Centres

Hey there, I'm a little late to the party, but I'm back again this week for Teacher by the Beach's link up: Monday Motivation! This week is tips and ideas on how I manage centers in my classroom.


I have two different times of day for centers: guided reading and guided math. I do a variation of Daily 5 for each. This is how I ran each of them last year and I'll talk a bit about what I plan to keep/change for next year. Again, set up will be a bit different because I'll be heading to a new classroom. :)

Guided Reading


Here is my pocket chart for organizing my guided reading centres. This was my first year implementing full-choice for which centres students went to and I absolutely LOVED it! I will definitely be doing this again next year (and doing it for math as well). I had three small tubs with the cards for first rotation, second rotation, and third rotation. Each student's picture/name card was down the side. The Guided Reading Cenre Cards are in my TpT store. I'm going to be updating them to be editable soon.

First I would put my "Read with Teacher" cards in the spots that I wanted to read with my groups (or sometimes individuals for running records). Then I would call table groups up to choose their centres. They would choose one centre from each basket. They had four choices to choose from: read to self, word work, writing, or listen to reading. I only had four iPods, so there were only four listening cards in each rotation basket. If they had a "Read with Teacher" card, they only picked two centres. If they didn't read with me that day, they got to pick three. Each day I chose a different table to pick first. 

Next year I will continue the three rotations and full choice, but I might have them just choose their centres in the morning after they have done all their unpacking and getting ready. I will also continue to have my iPods for listening, but I have five new classroom iPads, so I might make a fifth choice be iPad Word Work. 


For read to self, students took their book box and found a comfy spot around the room to read. Inside their book box they are allowed to have a max of five books from the classroom library (free choice, not levelled, based on interest) and can change these books at any time. They also have their poetry folder they can read and previous guided reading books we have done in group (at their level). I don't do "read to someone" separately, so if they would prefer to read with someone or by themselves, it doesn't matter to me. Sometimes if I have an EA or parent volunteer, I'll have them read with students too during this time.


For word work tubs, I had five different tubs with a variety of games/hands-on activities. The skills changed throughout the year: alphabet, letter sounds, CVC words, sight words, sentence writing, etc. I just changed them up when I noticed something wasn't getting chosen as much. They could choose any centre and they could switch centres when they finished one. I didn't have a lot of rules or requirements, as long as they were working and practicing their literacy skills.


For writing centres I used this tall plastic drawer unit. In the bottom drawer was their writing folder. The other drawers had different writing centres. Their folders had a "still working" pocket and "finished work" pocket, so they had to finish up their "still working" writing before they could choose a new centres. Some of the drawers stayed the same and some I changed up. I usually had sticker stories, regular story writing books, and letter templates available all year. Some other ideas I have used: doodle stories, Would You Rather? (by First and Kinder Blue Skies), comics, lists, book reviews, write the room, etc.


For listen to reading, I have a bucket of books they can choose from (I have almost 100 now... ekk! #teacherhoarder #scholasticmakesiteasy). Each book has a number on it. When I load the songs onto the iPods, I change the track title to the number and change the artist to the book title. So students grab a basket with the iPod and headphones, grab a book, and find a place to listen to their story! They just have to find the correct number track. Easy peasey! You can read more about my set up {here}. If they finished early, they just switched books. Each iPod has all of the songs on it, so anybody can listen to it. I've never had any writing/response activities with this centre; not sure if I will add this aspect in or just leave it the way it is.


I use my horseshoe table for guided reading groups. I used the rainbow drawer unit to store each group's materials. I had my Guided Reading Toolbox on top with all the tools I need for lessons. Each student brought their book box with them when we met, so they could read quietly while they waited for me to get to the table.

Guided Math


Last year I did not have students choose their math centres, I just grouped them and told them where to go. Next year I will use choice like my reading centres. Each group had a coloured shape and went to two centres a day. We only had four centres: math tubs, math work, iPod math, and work with teacher. The Guided Math Centre Cards are available in my TpT store. They will also be getting a mini update soon.


Kind of like my word work tubs, I had nine dish tubs on the cubby shelf that house different activities. Most of these were games we had played or hands-on activities with lots of manipulatives. They could choose any tub and switch at any time. 


Each student had a duotang with math work inside. I started the year off using Miss Kindergarten's Number Practice Printables, then moved on to other number work, addition/subtraction practice, etc. I really just used a bunch of different worksheets I had saved up. They worked at their own pace. Some students went through booklet after booklet, while others just did a few. I added some coloured washi tape at the top of the folder that matched each group's shape, so students could easily find their folder.

I'm really struggling with this centre next year. I want to move past using worksheets, so I might try and incorporate something with math books and writing. Or maybe use interactive notebooks. Not quite sure yet; stay posted while I work through this idea in my head. Haha!


I had some math games loaded onto my iPods, so they could play these games during iPod time. I let them use my iPad too, which had some fancier games on it ;) so that's why there is a little iPad card at the top of the pocket chart. If their group was on iPod math, the student with the iPad card got to use my iPad that day. Next year I have five iPads, so this won't be a problem.


And my horseshoe table again. I used the other drawers in the rainbow unit for my math groups. I would usually have something at the table for students to do while they waited for me to get there and begin. Some warm ideas: ten frame cards to play with, writing numbers in a blank 100 chart, Math Writing Strips (by Tara West), etc.

Well that's how things ran last year! I'm still thinking about what tweaks I'm going to do for next year. I think I'd like to have a bit more choice for math centres and less worksheets. I'll keep you posted! ;) Go check out Teacher by the Beach's link up for more ways to organize your centres. Everybody does it differently and that's ok! Find what works for you!


Monday 19 June 2017

Monday Motivation - Classroom Library Organization and Tips

Hey folks! I'm here to link up with Teacher by the Beach for her weekly Monday Motivation link up. Today is all about classroom library organization!


I am currently finishing up my mat leave so all I have for pictures is my classroom library from last year. The organization itself will stay the same, but I am moving into a new, bigger classroom (it used to be a kindergarten classroom) and getting some new furniture, so the look will be a bit different. Once I get it all set up in August I will share some new pictures!

My principal has given me permission to buy three shelving units for my new classroom, so I'll be getting these three IKEA Kallax shelves to hold most of my library. (I might end up getting another one or two of the smaller ones to fit all my book bins.)


Here's what my classroom library area looked like last year. Cozy carpet with pillows, small table with stools, basket of holiday/theme books. My organization system came from Ladybug's Teacher Files. I found her blog when I first started teaching first grade. I loved her organization and colour-coding. It was just amazing. I used her idea of numbering the baskets of books. (She mentions that she heard about that idea from the Daily 5 book.)


My books are organized by topics, series, and authors. I have about 50 different baskets of books. I used the Sterilite Ultra Medium Baskets. I got them from Canadian Tire, but you can find them on Amazon too. I've had them for six years now and they are still going strong. They are super durable and a perfect size.


Each of my labels has a title, a picture, and a number. The title tells what series/author/topic is in the basket, the picture corresponds to it, and the number just orders my baskets. Each book has a matching sticker with the number of the basket and the picture that matches the basket. So if students have an Elephant & Piggie book like the one below, they can look for the basket with the matching pigeon image or they can look in order for the number 32. The numbers help, plus it builds a bit of number sense too while they are putting their books away! "This is 32... it's not at the beginning and it's before 50... it's sort of in the middle!" 


The labels actually wrap around the spine of the book and the back of the labels have my class, my name, and the reading level. (Half my books still have my maiden name on it. lol. Oh well! That's what I get for changing my name. But Ross is soooooo much easier to spell and say. Haha!) The reading level is more just info for me--I don't make the students choose based on their levels. They have free range in choosing the books they wish to read. Interest + Choice = Engagement. 


I do have a leveled section that I use for home reading. Students take a book home from here each night (I tell them what letter to choose from), they read it and record it in a log, and then change the book the next day. This is not my favourite system--I dislike students knowing their "level" and having to choose from there, but I haven't quite figured another way to handle that yet... Any thoughts on home reading?


Each student has a book box where they keep their poetry folder, sight word practice, and independent reading books. I let them keep five books from the classroom library in here. They may exchange them at any time. I don't do "shopping days". Some kids will keep a book forever, others may change their books ten times a day. As long as they are reading, it doesn't bother me in the least.


I have a large collection of character stuffies (even more that aren't on display here...). Last year they were on a high shelf (I was in an old Science lab), but next year I will display them on top of the tall IKEA shelf.


I have always wanted a couch in my classroom library area and ever since I saw Schoolgirl Style's room I knew I wanted the IKEA Klippan. It's the perfect shape and I love how low it is. Perfect for firsties. Plus bonus the cover is removable so I can just throw it in the wash anytime I need. I kept my eyes open on Kijiji and found one for a decent price. My awesome parents even picked it up for me and delivered it to my house. So now it is just sitting in my garage until I can move it to school in a few weeks! Woo hoo!


Then I found this Poang Children's Chair in the clearance section for 30% off in great condition, so I got it for my reading corner too. (Yes, my classroom is like 90% IKEA. So what? lol)


As much as I don't want my time at home to be over, I am soooo excited to go and set up my new classroom! :) Don't forget to stop by Teacher by the Beach for more library organization ideas!

Tuesday 14 March 2017

Breakout EDU... What Is It??

Hey folks! I'm back again to share with you an AMAZING new activity I learned about this past year. Have you ever heard of Escape Rooms? You essentially get locked in a room and need to solve puzzles and riddles in order to escape the room in the time limit. There's usually a story to go with it like you are trying to escape death row or break into the bank. They are soooo much fun and are popping up all over the place! Love them!

Anywho, Breakout EDU takes the idea of an escape room and applies it to the classroom. Instead of escaping a room though, they need to "break into" a locked box. Basically there is a large box that is locked by a few different types of locks and they need to solve puzzles in order to open the different locks. These games are amazing for working on critical thinking, problem solving, collaboration, and communication. They can also be used with any grade level or subject area. There are puzzles already created for grades Pre-K to Adult level and in every subject area.

Check out the website by clicking here or the logo below. If you "Register for Access", you will get a password and access to TONS of ideas and games. Check it out!


Here's an introduction video of what Breakout EDU is all about:


To start with, you need a Breakout Kit. You can buy them from the site for $125US each. In the kit you will get the following: a large Breakout Box, a small Breakout Box, a hasp, hint cards and reflection cards, a 5-arrow directional lock, a 5-letter word lock, a UV marker and flashlight, a USB drive, a key and lock, a 3-digit lock, and a 4-digit lock. Click here or the picture below to check them out:


If you want to make your own kit, you can check out Walmart, Home Depot, Dollar Tree, Canadian Tire, and Amazon to find all of your Breakout kit needs! You basically need a large toolbox or other container that a lock or hasp can be put on and another smaller lockable box or pouch. Then you need a variety of different locks, a UV marker, and a blacklight flashlight,. If you click here or the images below, you can find the doc with links to Amazon to purchase these materials.


You can have one kit for the entire group (there are many different explanations on how to run a game with one kit, ie. the "ticket system") or a few kits to do your breakouts in small groups. I have four kits.

Here is a game that I designed and ran with some second and first grade classes. It was based on the book "The Mitten" by Jan Brett. Each Breakout starts with a story, so mine was the animals found Nikki's mitten and did not want to give it back, so they locked it up in a box. Nikki needs to break into the box and get the mitten before he has to get home to Baba.

I divided the class into four groups. So each group had a table with the large locked toolbox (the hasp allows for six locks to be used on one box--we only used four with this game), the small locked pouch, two hint cards (to give to me if they were really stuck), a code recording sheet (to write down the codes they figured out), and a lock parking lot to place the opened locks (to prevent locks from getting broken, reset, or mixed up). I colour-coded my four groups, but that's not necessary. I just like things to be colour-coded. lol


Around the room were other clues and puzzles for them to use and solve.


There was a timer for 45 minutes on the projector. You can find different timers on YouTube here. My favourite is the Breakout Timer with Suspenseful Music.


They had to find a key to get into the smaller pouch which had more clues and puzzle pieces to help them get into the big box.


They had to work together and really think critically to solve the problems.


When they got all the locks off the box, inside was the white mitten, Breakout stickers, and a sign. No prizes, no candy, no treats. Just the satisfaction of completing the puzzles and getting into the box. Actually the stickers were a big hit, but every group was super proud of their accomplishments.


And just like in the tradition of escape rooms, you get to take a group photo with some "We did it!" signs. (I do have signs for groups that don't breakout... but they're still positive and fun like "We almost broke out!" and "So close!") Even if groups don't succeed, they are still amazed by how much they accomplished and can't wait to do another one!


My cute, laminated, hot glued labels did not last a full-day with ones and twos, so I pulled out the Cricut and cut out some cute vinyl labels for my boxes. Love them!!


If you want to check out more about "The Mitten" Breakout, you can watch my set up video here and download all the documents here. I've submitted the game to be reviewed, so hopefully it makes it to the official site! Until then, go register and take a look at all the amazing games out there! I did the "Elf" Christmas game with my family over the holidays and then used the game "The Faculty Meeting" when I presented to staff in my division about Breakout EDU.

Also, if you want more resources or ideas join the Facebook groups: Breakout EDU (General Discussion) and Breakout EDU Elementary Teachers. Leave any questions you have in the comments or send me an email: firstgradegarden@gmail.com And please take a few seconds to answer the questions below:


Friday 17 February 2017

25 Picture Books for Teaching Digital Citizenship


Technology is become more and more prevalent in our schools and our daily life. It's important as teachers (and parents) that we talk to our students and children about online safety, manners, and how to regulate our technology use. Her are some good, old-fashioned picture books to help you teach some of these concepts to young children. (This post contains affiliate links to Amazon.ca.)

Books for Teaching About Technology Addiction

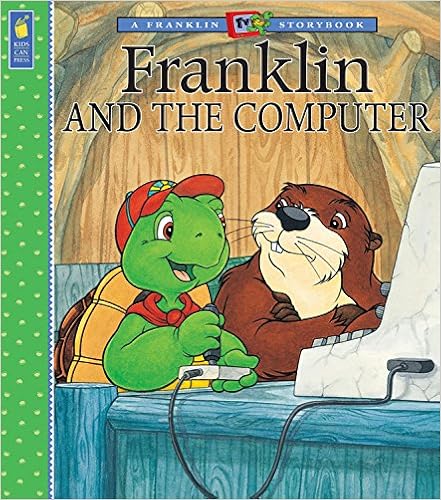
Franklin becomes addicted to a computer game and stops hanging out with his friends or playing outside. 

When the power goes out, Charlie needs to learn how to have fun without his electronics.

Bad Kitty has to take a break from his favourite video game and finds out there are other fun things to do instead.

Webster's Bedtime by Hannah Whaley
Webster the spider learns that all his devices need to go to sleep at nighttime, just like he does!

Jasper is addicted to his video games and has to learn to enjoy them, but have balance in his life.

Lydia teaches her family about all the fun they are missing when they are stuck on all their gadgets.

Doug the robot experiences everything through downloading information from a plug. One day he decides to go outside and experience everything first hand instead!

The Bear family becomes addicted to a computer that Papa Bear brings home, so he has to figure out a solution to get the family off the computer!

A parody of Laura Numeroff's books, a mouse becomes addicted to an iPhone and doesn't realize what is going on around him.

A parody of the book "Goodnight Moon", we realize that our life s not so quiet anymore with all the buzzing and beeping electronics around us.

Books About Being a Good Digital Citizen

The school librarian helps the students learn that not everything they read on the internet is true and helps the students learn to figure out what to believe or not.

A non-fiction book that covers topics such as staying safe, showing respect, and using technology wisely. 

A non-fiction book that looks at what computers are used for, how to store information and search online, and playing games online.

Webster the spider learns that you need to use manners with technology. He learns there are appropriate times to use devices and times when you should put your devices away. 

Webster the spider learns about email etiquette and how fast an email can travel around. When he sends a silly picture of his sister, he realizes that he can't get that email back and should think carefully about the emails he sends.

Books About Online Safety

Some of the fairy tale characters learn some lessons about online safety when a laptop suddenly arrives in Fairy Tale Land.

Chicken uses the farmer's computer to do some online shopping and then goes off to meet a friend she met online. Chicken learns a lesson when she does not tell her parents where she is going and the friend is not quite what she expected...

Elephant thinks all the students at his new school are weird and not like him, so he meets a friend online that looks the same and has the same interests as him. He gets a big surprise when he finally meets his new friend.

A non-fiction book that teaches about passwords and keeping your information safe online. Also talks about mindfulness when posting things online.

Aidan teaches his puppy how to be safe online.

Another non-fiction book about online safety. Discusses smart online searching, guarding your personal information, and how to make friends online safely.

An easy reader non-fiction book about ways to be safe online.

A Rookie Read-About Safety non-fiction book about being safe on the internet.

Webster the spider learns about telling the truth online and that sometimes the people you are talking to online are not who they seem...

Books About Cyberbullying

When Billy Goat finds the farmer's cell phone, he and his friend start sending nasty messages to the troll under the bridge. They learn a valuable lesson about cyberbullying when they actually meet the troll!

I hope you enjoy some of these books and that they help you have some good conversations with your students about how to be safe and respectful digital citizens.